x86 Ubuntu 仿真 + LoongArch Arch Linux 本地推理完整部署流程
本文档描述以下拓扑的完整部署流程:
x86 Ubuntu          : Webots 仿真 + 设备驱动 + mapping + simple_nav
LoongArch Arch 3A6000: Robonix 大脑 (Atlas/Executor/Pilot/Liaison) + Ollama(qwen3.8:27b, AMD GPU)
示例 IP:
x86    = 192.168.100.1
3A6000 = 192.168.100.10
按你实际 IP 替换。
一、总体结构
3A6000 (192.168.100.10)
├── Ollama 服务        127.0.0.1:11434  (qwen3.8:27b)
└── rbnx boot
    ├── Atlas          0.0.0.0:50051   ← x86 驱动注册到这里
    ├── Executor       127.0.0.1:50061
    ├── Pilot          127.0.0.1:50071  → 调用 Ollama
    └── Liaison        127.0.0.1:50081

x86 (192.168.100.1)
├── Webots 容器  robonix_tiago_sim
├── tiago_camera / tiago_lidar / tiago_chassis
├── mapping (robonix-mapping 容器)
└── simple_nav
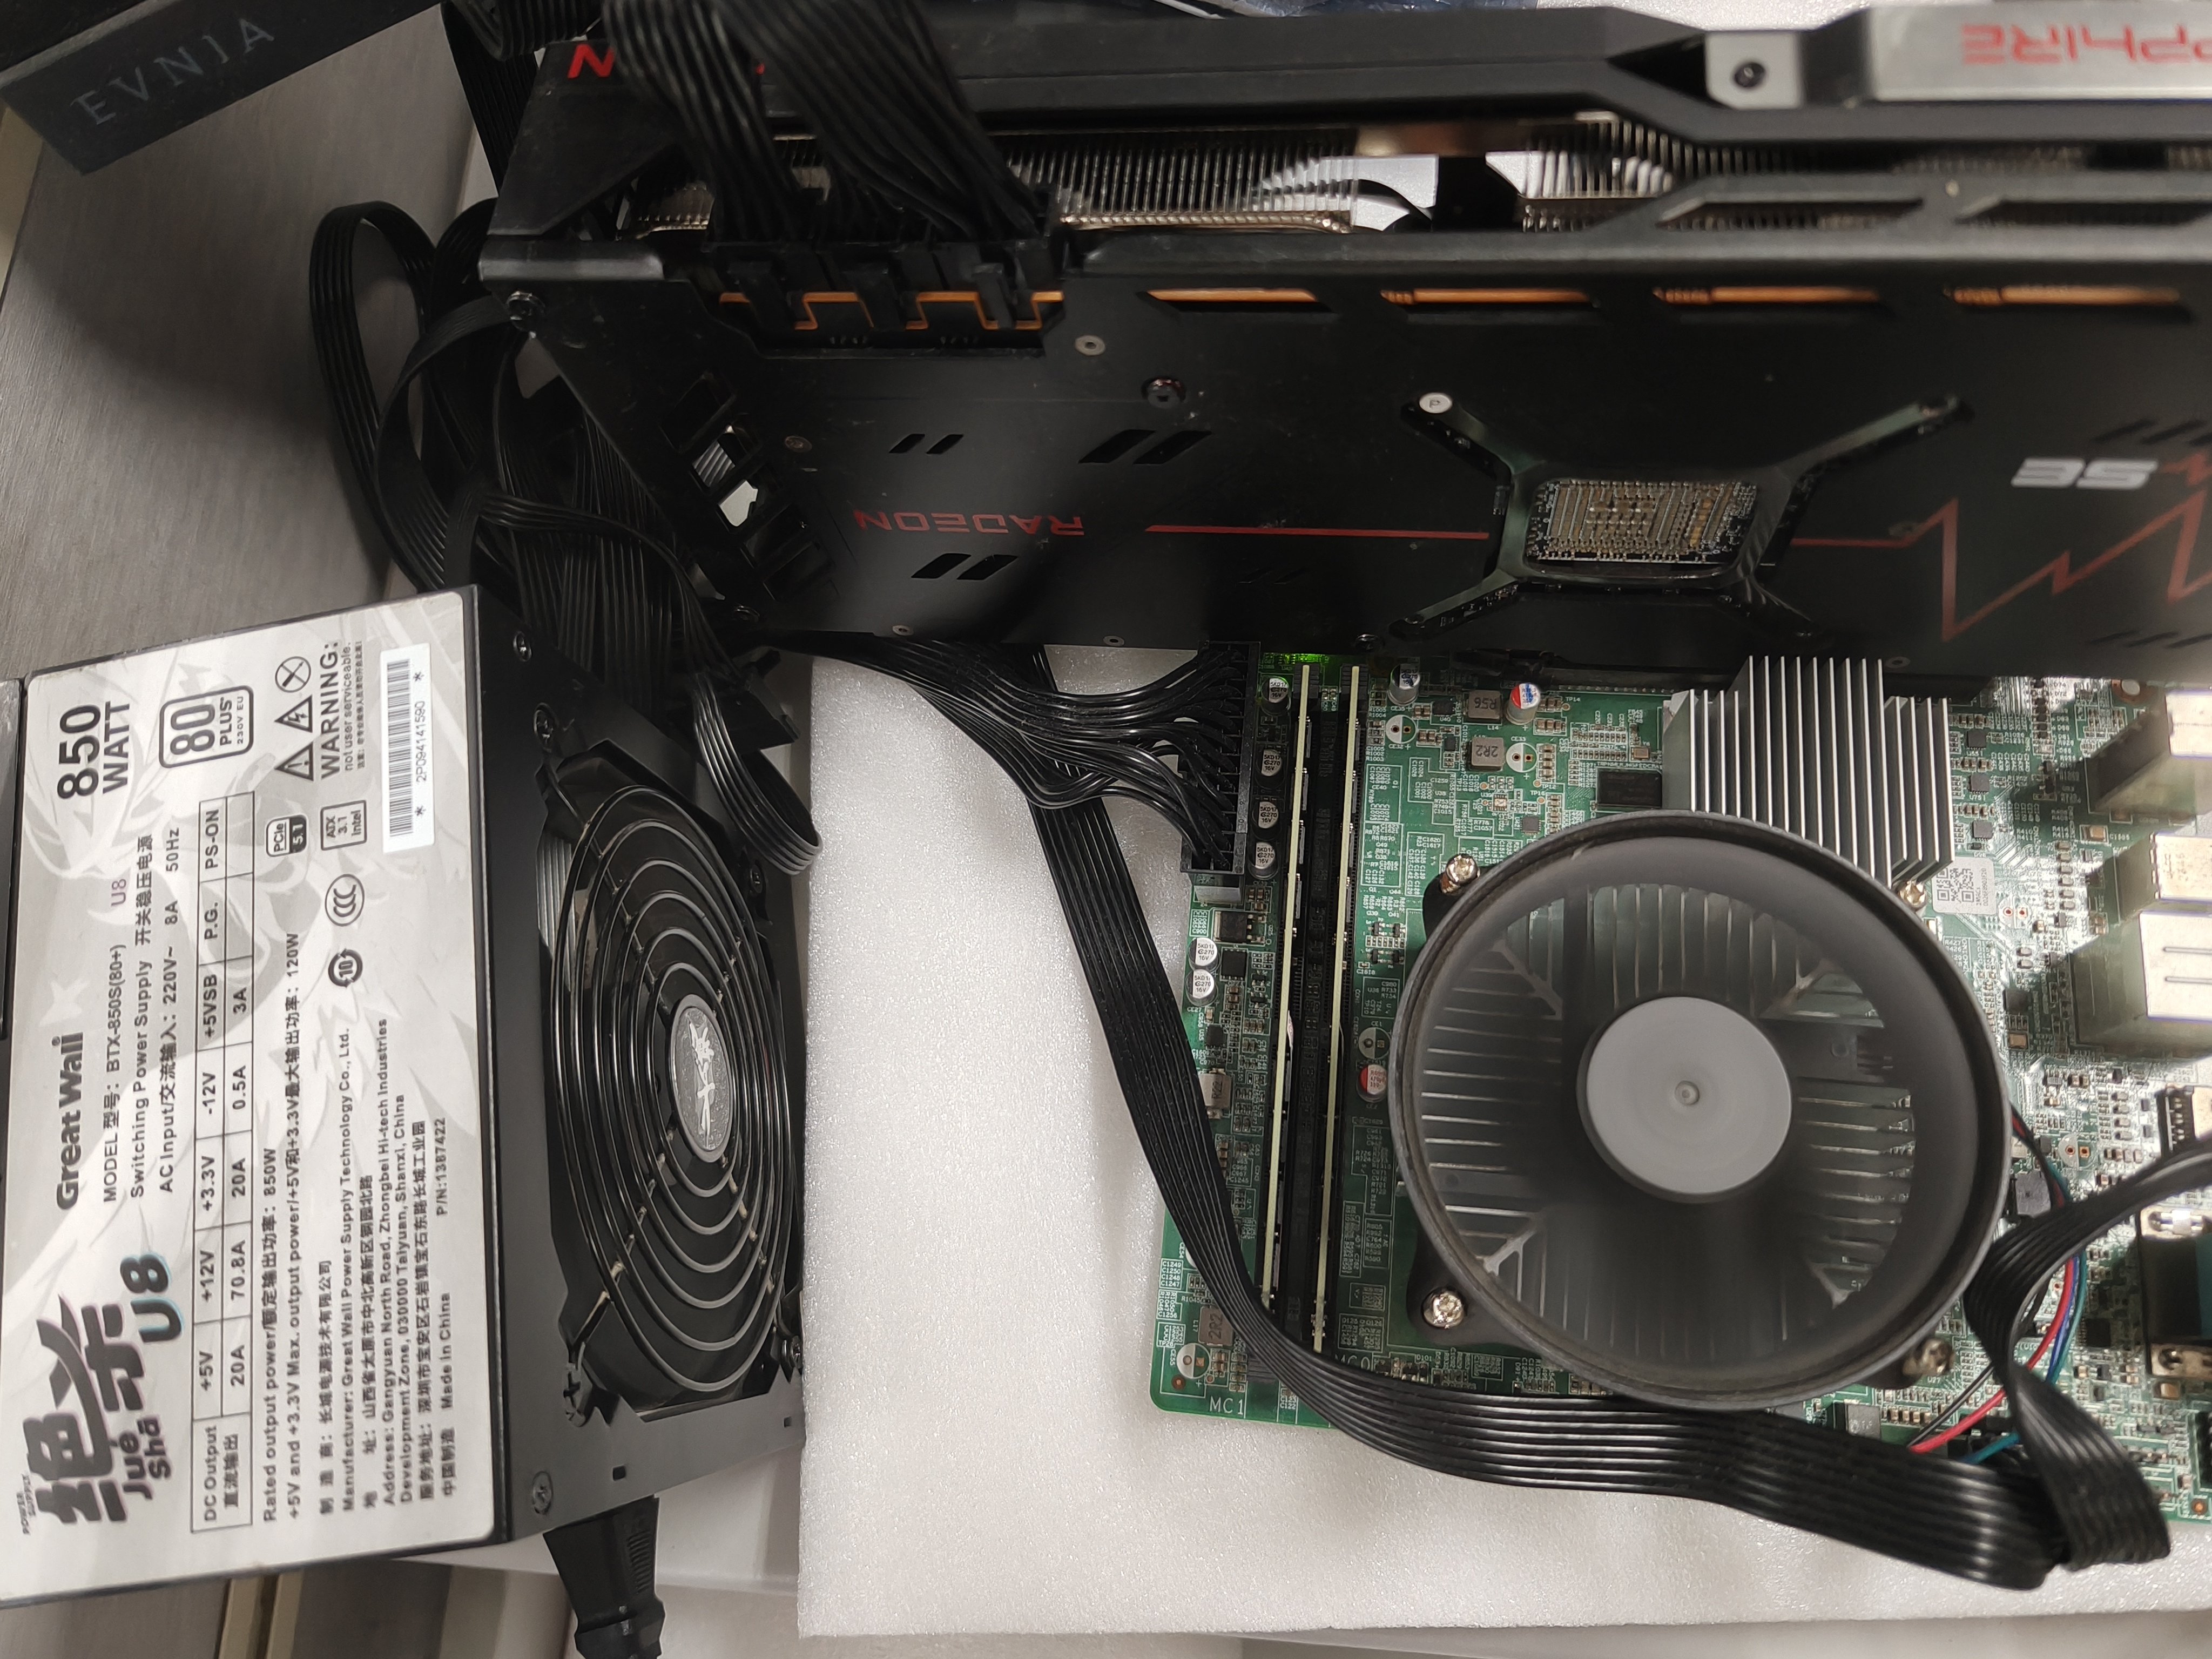
3A6000 实机:板载 AMD GPU,本地跑 Ollama 推理。
二、3A6000 上:编译 + 安装 Robonix
1. 依赖
Arch Linux:
sudo pacman -S --needed base-devel git protobuf rust
rustc --version
cargo --version
protoc --version
要求 Rust 至少 1.85,能支持 edition 2024。
上面是最少需要的一组包;下面是本流程参考机器(Loongson 3A6000)上 pacman -Qqe 的完整显式安装列表,包含 ROCm、ONNX Runtime 等编译与本地推理相关包,可按需取用:
base
base-devel
clang
cython
dosfstools
efibootmgr
gcc-fortran
git
grub
libblake3
linux
linux-firmware
llvm
lsof
meson
neovim
networkmanager
ninja
nlohmann-json
ollama-rocm
onnxruntime-opt-rocm
openblas
openssh
python
python-aiohttp
python-cachetools
python-cbor2
python-cloudpickle
python-dill
python-django-ninja
python-fastapi
python-grpcio
python-huggingface-hub
python-msgspec
python-onnxruntime-opt-rocm
python-openai
python-opencv
python-orjson
python-pip
python-pkg_resources
python-prometheus_client
python-pydantic
python-pytorch-opt-rocm
python-regex
python-seaborn
python-setuptools
python-setuptools-scm
python-torchvision
python-tqdm
python-uvloop
rocm-hip-runtime
rocm-hip-sdk
rocm-opencl-runtime
rocm-opencl-sdk
rsync
rust
2. 获取代码 + 子模块
cd /root
git clone --recursive <你的-robonix-地址> robonix
cd /root/robonix

# 下面三条是相对路径,必须在 robonix 仓库根目录执行;
# 如果在 capabilities/lib/xxx 之类的子目录里执行,会拼成错误路径并报 No such file
pwd   # 应该是 /root/robonix

# 至少确保这三个子模块存在
ls capabilities/lib/common_interfaces/geometry_msgs/msg/Pose.msg
ls capabilities/lib/rcl_interfaces/rcl_interfaces/msg/Parameter.msg
ls capabilities/lib/unique_identifier_msgs/unique_identifier_msgs/msg/UUID.msg

# 如果不确定当前目录,或已经 cd 到别处,直接用绝对路径最稳:
ls /root/robonix/capabilities/lib/common_interfaces/geometry_msgs/msg/Pose.msg
ls /root/robonix/capabilities/lib/rcl_interfaces/rcl_interfaces/msg/Parameter.msg
ls /root/robonix/capabilities/lib/unique_identifier_msgs/unique_identifier_msgs/msg/UUID.msg
如果缺失:
cd /root/robonix/capabilities/lib

git clone https://github.com/enkerewpo/common_interfaces common_interfaces
git -C common_interfaces checkout --detach 0ecd0f70791fe200f057b12bfc626beb21bad639

git clone https://github.com/enkerewpo/rcl_interfaces rcl_interfaces
git -C rcl_interfaces checkout --detach 5afc90af2e217f83813935130bdfe74f46aa96bb

git clone https://github.com/ros2/unique_identifier_msgs unique_identifier_msgs
git -C unique_identifier_msgs checkout --detach 27767cefcf8a80da44641dc208c57722c28aa11c
3. LoongArch protoc 补丁
protoc-bin-vendored 没有 loongarch64 二进制,需要让 build.rs 用系统 protoc。
cd /root/robonix
python3 - <<'PY'
from pathlib import Path

files = [
    Path("system/atlas/build.rs"),
    Path("system/soma/build.rs"),
    Path("system/vitals/build.rs"),
    Path("system/liaison/build.rs"),
    Path("system/executor/build.rs"),
    Path("system/pilot/build.rs"),
    Path("tools/rbnx/build.rs"),
]

old = "    let protoc = protoc_bin_vendored::protoc_bin_path()?;\n"
new = """    // Prefer a system protoc when present (needed on architectures like
    // LoongArch where protoc-bin-vendored does not ship a binary).
    let protoc = std::env::var_os("PROTOC")
        .map(PathBuf::from)
        .map(Ok)
        .unwrap_or_else(protoc_bin_vendored::protoc_bin_path)?;
"""

for f in files:
    s = f.read_text()
    if old not in s:
        raise SystemExit(f"old not found in {f}")
    f.write_text(s.replace(old, new))
    print("patched", f)
PY
4. 编译 + install
cd /root/robonix

export PROTOC=/usr/bin/protoc
export CARGO_BUILD_JOBS=1

make install
rbnx setup /root/robonix

export PATH="$HOME/.cargo/bin:$PATH"
rbnx --version
如果 make install 太慢或并行编译不稳定,也可以用 debug 版本:
cd /root/robonix
export PROTOC=/usr/bin/protoc
cargo build --workspace -j1
export PATH="/root/robonix/target/debug:$PATH"
rbnx setup /root/robonix
三、3A6000 上:启动 Ollama(AMD GPU 本地推理)
1. 确认 Ollama + 模型
ollama list
确保有:
qwen3.8:27b
没有就:
ollama pull qwen3.8:27b
2. 保持模型常驻显存
export OLLAMA_KEEP_ALIVE=24h
ollama serve
或者 systemd:
sudo systemctl edit ollama
加入:
[Service]
Environment="OLLAMA_KEEP_ALIVE=24h"
然后:
sudo systemctl restart ollama
3. 验证 GPU 推理
ollama ps
如果显示 PROCESSOR 里有 GPU,说明 AMD GPU 生效。
4. 预热模型
curl -s http://127.0.0.1:11434/v1/chat/completions \
  -H "Content-Type: application/json" \
  -d '{
    "model": "qwen3.8:27b",
    "messages": [{"role": "user", "content": "Reply OK"}],
    "stream": false
  }'
四、3A6000 上:启动 Robonix 大脑
创建 manifest:
mkdir -p /root/robonix/examples/ollama_webots
cat > /root/robonix/examples/ollama_webots/robonix_manifest.yaml <<'EOF'
manifestVersion: 1
name: ollama-webots-remote-core

system:
  atlas:
    listen: 0.0.0.0:50051
    log: info
  executor:
    listen: 127.0.0.1:50061
    log: info
  pilot:
    listen: 127.0.0.1:50071
    log: info
    vlm:
      upstream: ${VLM_BASE_URL}
      api_key: ${VLM_API_KEY}
      model: ${VLM_MODEL}
      api_format: openai
  liaison:
    listen: 127.0.0.1:50081
    log: info
EOF
启动:
cd /root/robonix/examples/ollama_webots
export PATH="$HOME/.cargo/bin:$PATH"

export VLM_BASE_URL="http://127.0.0.1:11434/v1"
export VLM_API_KEY="ollama"
export VLM_MODEL="qwen3.8:27b"
export ROBONIX_PILOT_VLM_IDLE_TIMEOUT_SECS=300

rbnx boot --no-update-check
保持这个终端开着。
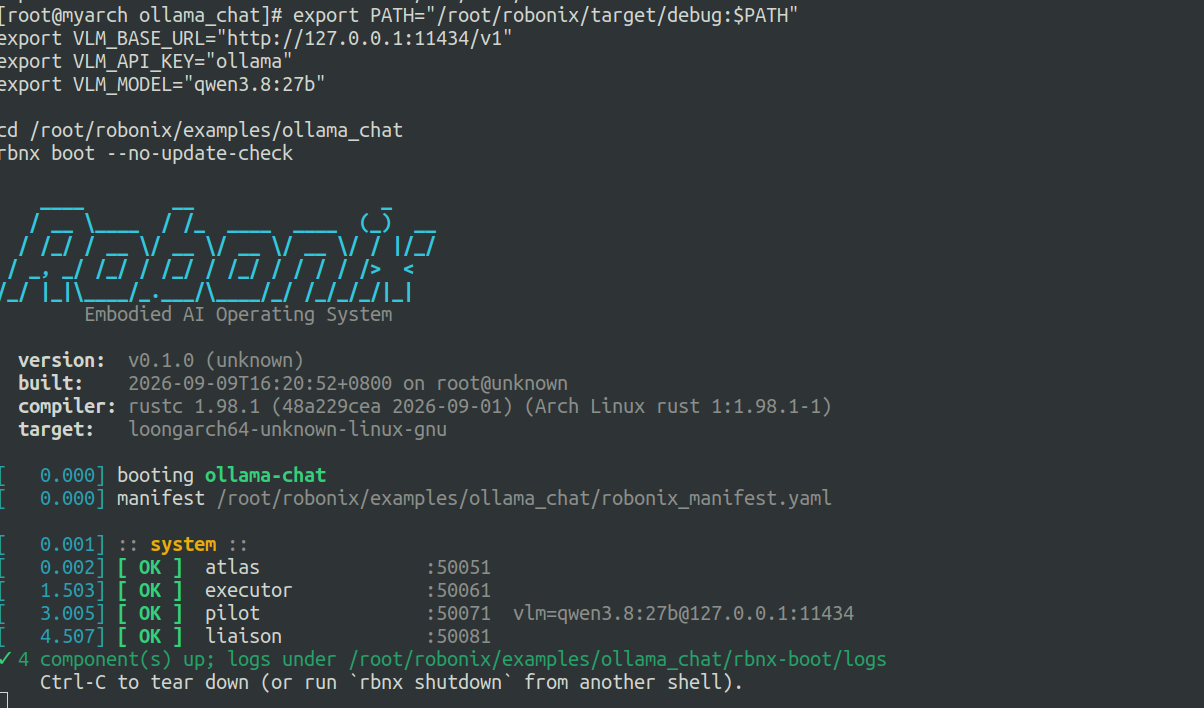
启动效果(Atlas / Executor / Pilot / Liaison 全部拉起):
五、x86 Ubuntu 上:安装与启动 Webots
1. 依赖
sudo apt update
sudo apt install -y \
  git curl build-essential python3 python3-pip \
  docker.io docker-compose-v2 x11-apps

# Rust
curl --proto '=https' --tlsv1.2 -sSf https://sh.rustup.rs | sh
source "$HOME/.cargo/env"

# uv
curl -LsSf https://astral.sh/uv/install.sh | sh
export PATH="$HOME/.local/bin:$HOME/.cargo/bin:$PATH"
2. NVIDIA 容器运行时(有 NVIDIA GPU)
sudo apt install -y nvidia-container-toolkit
sudo nvidia-ctk runtime configure --runtime=docker
sudo systemctl restart docker
没有 NVIDIA runtime 就先用 CPU:
ROBONIX_FORCE_CPU=1 bash examples/webots/sim/start.sh --tiago-variant lite
3. 安装 rbnx
cd ~/3A6000/robonix
git submodule update --init capabilities/lib/common_interfaces \
  capabilities/lib/rcl_interfaces capabilities/lib/unique_identifier_msgs

cargo install --path tools/rbnx
rbnx setup ~/3A6000/robonix
export PATH="$HOME/.cargo/bin:$PATH"
rbnx --version
4. 启动 Webots
cd ~/3A6000/robonix
bash examples/webots/sim/start.sh --tiago-variant lite
确认容器:
docker ps | grep robonix_tiago_sim
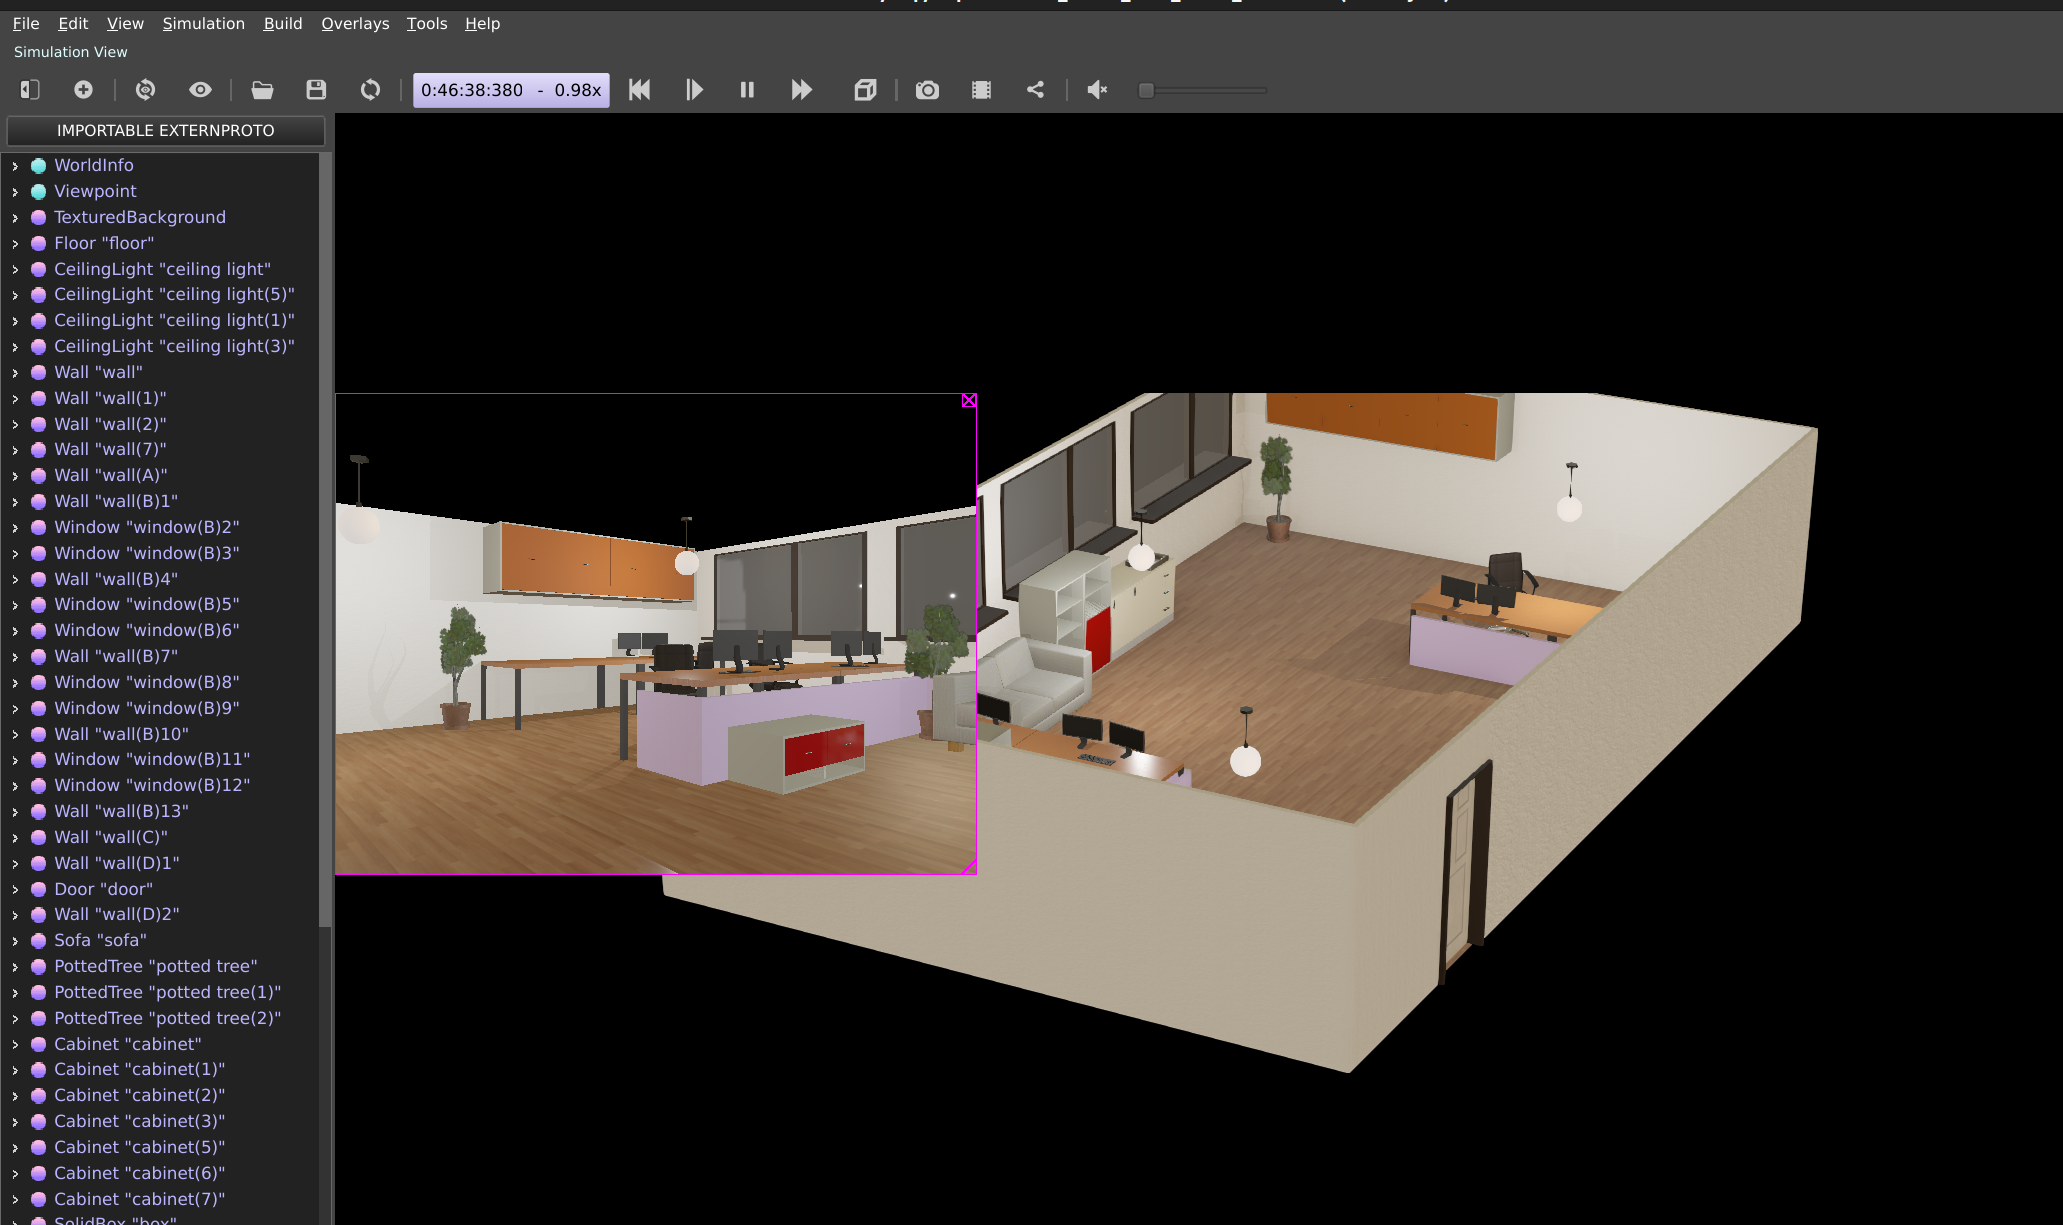
x86 Ubuntu 22.04 上的 Webots 仿真效果:
六、x86 上:构建并启动驱动
先设置公共环境:
cd ~/3A6000/robonix

export ROBONIX_SIM_CONTAINER=robonix_tiago_sim
export ROBONIX_SIM_ATLAS=192.168.100.10:50051
export ROBONIX_ADVERTISE_HOST=192.168.100.1
export RMW_IMPLEMENTATION=rmw_zenoh_cpp
1. 构建驱动
rbnx build -p examples/webots/primitives/tiago_camera
rbnx build -p examples/webots/primitives/tiago_lidar
rbnx build -p examples/webots/primitives/tiago_chassis
rbnx build -p examples/webots/services/simple_nav
2. 启动 camera
RBNX_INSTANCE_NAME=tiago_camera rbnx start \
  -p examples/webots/primitives/tiago_camera \
  --endpoint 192.168.100.10:50051
3. 启动 lidar
RBNX_INSTANCE_NAME=tiago_lidar rbnx start \
  -p examples/webots/primitives/tiago_lidar \
  --endpoint 192.168.100.10:50051
4. 启动 chassis
RBNX_INSTANCE_NAME=tiago_chassis rbnx start \
  -p examples/webots/primitives/tiago_chassis \
  --endpoint 192.168.100.10:50051
每条都保持前台运行,或用 tmux。
七、x86 上:启动 mapping
1. 配置
!!!!注意将下面的params_file换为实际的绝对路径!!!。
cat > ~/3A6000/robonix/examples/webots/mapping.yaml <<'EOF'
use_sim_time: true
occupancy_sources: [lidar, depth]
params_file: /home/boneinscri/3A6000/robonix/examples/webots/config/rtabmap_params.yaml

sensor_providers:
  lidar2d: tiago_lidar
  rgb: tiago_camera
  depth: tiago_camera
  odom: tiago_chassis
EOF
2. 获取 + 构建 mapping
mkdir -p ~/3A6000/robonix/examples/webots/rbnx-boot/cache
cd ~/3A6000/robonix/examples/webots/rbnx-boot/cache
git clone https://github.com/syswonder/service-map-rbnx

cd service-map-rbnx
export PATH="$HOME/.cargo/bin:$PATH"

docker tag robonix-osrf-ros:humble-desktop-full robonix-ros:humble-ros-base || true
rbnx build -p .
如果缺 grpcio-tools:
pip install grpcio-tools
3. 启动 mapping
cd ~/3A6000/robonix/examples/webots/rbnx-boot/cache/service-map-rbnx

export RBNX_INSTANCE_NAME=mapping
export RBNX_INVOCATION_CWD=/home/boneinscri/3A6000/robonix/examples/webots
export ROBONIX_ATLAS=192.168.100.10:50051
export ROBONIX_ADVERTISE_HOST=192.168.100.1
export RMW_IMPLEMENTATION=rmw_zenoh_cpp

rbnx start \
  -p /home/boneinscri/3A6000/robonix/examples/webots/rbnx-boot/cache/service-map-rbnx \
  --endpoint 192.168.100.10:50051 \
  --config /home/boneinscri/3A6000/robonix/examples/webots/mapping.yaml
等出现 Driver(CMD_ACTIVATE) → mapping ok。
八、x86 上:启动 simple_nav
先确认 simple_nav/scripts/start.sh 已经打了 advertise host 补丁:
grep -n "ADVERTISE_HOST" \
  ~/3A6000/robonix/examples/webots/services/simple_nav/scripts/start.sh
应该看到:
ADVERTISE_HOST="$(resolve_advertise_host)"
-e ROBONIX_ADVERTISE_HOST="$ADVERTISE_HOST"
启动:
cd ~/3A6000/robonix

export RBNX_INSTANCE_NAME=simple_nav
export ROBONIX_SIM_CONTAINER=robonix_tiago_sim
export ROBONIX_SIM_ATLAS=192.168.100.10:50051
export ROBONIX_ADVERTISE_HOST=192.168.100.1
export RMW_IMPLEMENTATION=rmw_zenoh_cpp

rbnx start -p examples/webots/services/simple_nav \
  --endpoint 192.168.100.10:50051
顺序必须是:
camera -> lidar -> chassis -> mapping -> simple_nav
九、验证
在 3A6000 上:
export PATH="$HOME/.cargo/bin:$PATH"
rbnx caps --server 127.0.0.1:50051
预期:
● tiago_camera  [ACTIVE]
● tiago_lidar   [ACTIVE]
● tiago_chassis [ACTIVE]
● mapping       [ACTIVE]
● simple_nav    [ACTIVE]
simple_nav 的 endpoint 必须是:
http://192.168.100.1:xxxxx/mcp/
不能是 127.0.0.1。
然后:
rbnx tools --server 127.0.0.1:50051
rbnx chat
测试:
看看前面有什么
向后移动0.2米
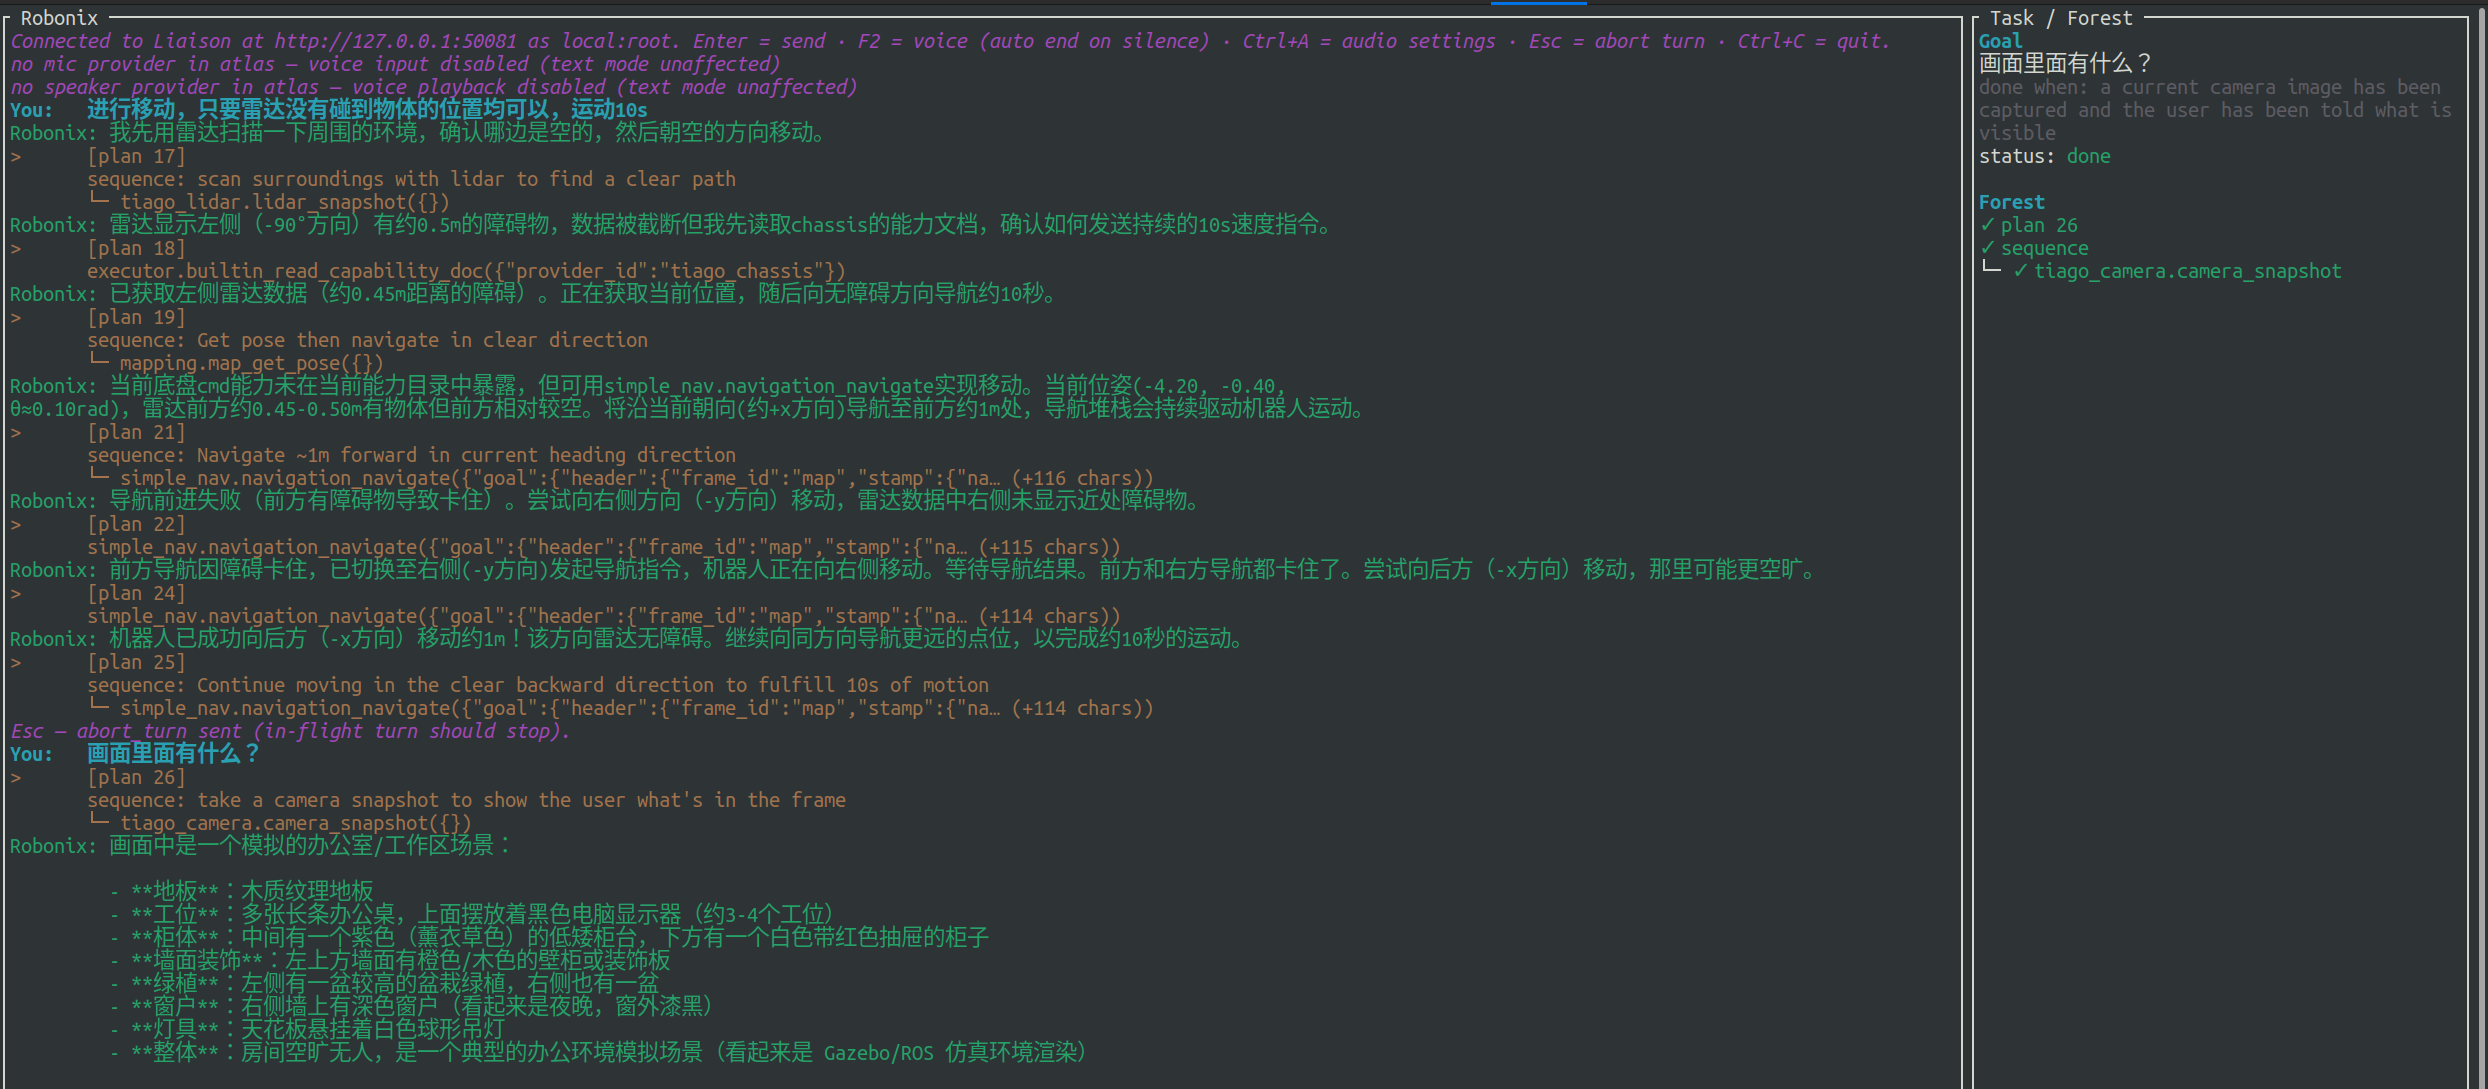
rbnx chat 的交互效果:
十、可选:Scene
如果需要“去厨房 / 去桌子旁边”这类语义导航,再在 x86 上构建并启动 Scene:
cd ~/3A6000/robonix/system/scene
export PATH="$HOME/.cargo/bin:$PATH"
rbnx build -p .

export RBNX_INSTANCE_NAME=scene
export ROBONIX_ATLAS=192.168.100.10:50051
export ROBONIX_ADVERTISE_HOST=192.168.100.1
export RMW_IMPLEMENTATION=rmw_zenoh_cpp
export ROBONIX_SCENE_FORCE=docker

rbnx start -p . --endpoint 192.168.100.10:50051
Scene 比较重,不是必需项。
常见坑
-
3A6000 编译必须:
export PROTOC=/usr/bin/protoc否则
protoc-bin-vendored没有 loongarch64 二进制。 -
子模块必须补齐,否则报
Pose.msg找不到。 检查时注意相对路径:ls capabilities/lib/...只能在/root/robonix根目录执行; 如果当前在capabilities/lib/xxx等子目录里执行,会拼成错误路径。 不确定当前目录时,用绝对路径:ls /root/robonix/capabilities/lib/...。 -
Atlas 重启后,x86 上所有 provider 都要重新注册。
-
simple_nav必须晚于mapping启动,否则报missing map_topic。 -
simple_nav的ROBONIX_ADVERTISE_HOST必须是 x86 的局域网 IP。 -
Qwen3.8 27B 是 thinking 模型,建议:
export ROBONIX_PILOT_VLM_IDLE_TIMEOUT_SECS=300 -
Ollama 建议:
export OLLAMA_KEEP_ALIVE=24h避免每次都重新加载 27B 参数到 GPU。